Tutorial: Triggering a pipeline via SQS🔗
There are many ways to trigger a pipeline in Maia. You can use time-based scheduling, or trigger manually on demand via the user interface or API. But a common use case is to automatically trigger a pipeline in response to an event in another system. Maia allows this kind of event-driven architecture via AWS Simple Queue Service (SQS).
The AWS Simple Queue Service lets you set up a message queue that you can read with an AWS Lambda function and use to trigger a Matillion Maia pipeline. In this tutorial, we'll set up an SQS queue, create a Lambda function to read messages from that queue, and configure the Lambda function to trigger a Maia pipeline when a message is received. We will cover each of these steps in the following sections of this tutorial.
By the end of this tutorial, you will have all the information you need to set up an SQS-triggered pipeline running in your own Maia environment.
This approach is offered by Matillion as a solution to the common customer requirement for event-driven pipeline triggering via SQS. However, implementing this solution does require some custom development and maintenance by the customer, as it involves creating and managing AWS Lambda functions and SQS queues. You will be responsible for both the cost and the upkeep of the Lambda function code, its deployment, and the API Gateway configuration.
Note
As AWS change details on their platform from time to time, the screenshots and steps in this tutorial may differ slightly from what you see in your AWS account. However, the overall process and concepts should remain the same.
Prerequisites🔗
To complete this tutorial, you will need the following:
- Access to an existing Maia instance with appropriate API credentials. If you are not familiar with API credentials in Maia, read Authenticating to the API.
- Access to an AWS account with permissions to create SQS queues and Lambda functions.
We assume that you are already familiar with the basics of using Maia. If you are not, we recommend you read the New user tutorial first.
We also assume you know how to pass triggering messages from your own systems to the SQS queue. If you aren't familiar with SQS, read the AWS SQS documentation for more information. This tutorial will focus on setting up the SQS queue and Lambda function to trigger Maia pipelines, rather than how to send messages to SQS from your own applications. For testing purposes, we will create a simple Maia pipeline later in this tutorial that sends a test message to the SQS queue.
Messages🔗
The Lambda function will expect SQS messages in a specific format to trigger the pipeline in Maia. Each message must contain the following fields:
- projectName: The project in which the pipeline is located.
- environmentName: The environment in which the pipeline will be executed.
- pipelineName: The name of the pipeline to be triggered.
- scalarVariables: Scalar variables required for the pipeline execution. This is optional, and can be omitted if no variables are needed.
- gridVariables: Grid variables used during pipeline execution. This is also optional and can be omitted if not needed.
Other optional fields can be added as required. For a full list of fields that are relevant to pipeline executions, refer to the Maia public API reference.
The message should be sent from your application or service to the SQS queue in JSON format, as shown in the example below:
{
    "projectName": "Production Pipelines",
    "environmentName": "Production - Snowflake",
    "pipelineName": "Customer Data Load",
    "scalarVariables": {
        "name": "Test Customer"
    }
}
This is a very simple message that will allow us to demonstrate the feature in this tutorial. For testing purposes, we will be generating this message from a Maia pipeline, as described in Testing the setup later in the tutorial. The message specifies the project, environment, and pipeline to be triggered from the SQS queue, along with a single scalar variable "name" with the value "Test Customer".
In a production scenario, the message can contain as many scalar and grid variables as needed. The key to unlocking the power of the Maia pipeline is the ability to pass in variables via the message, allowing for dynamic and flexible pipeline executions based on the content of the messages received.
Set up an AWS SQS queue🔗
We will create a new SQS queue to receive messages that will trigger our Maia pipelines.
SQS supports two types of message queue: Standard and FIFO (First-In-First-Out). For this tutorial, we will use a FIFO queue. This allows us to preserve our message ordering, so we do things in the order they are received. A Standard queue could also be used, if that suits your particular scenario.
- Log in to the AWS Management Console.
-
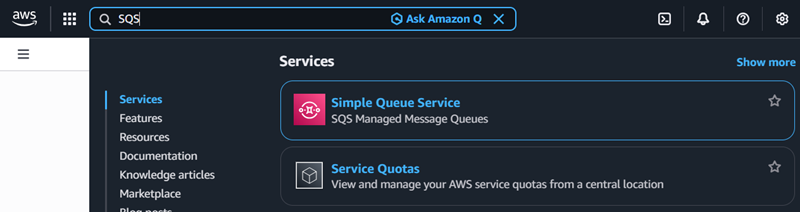
Navigate to the SQS service. If you don't see the option on the Console home screen, use the search bar at the top to search for "SQS".
-
Click Create queue.
- Click FIFO as the queue type.
- Give your queue a name. In this example, we are naming it
MatillionPipelineTrigger.fifo. Note that FIFO queue names must end with.fifo. - Leave the other settings as default, and click Create queue.
In a production scenario, you may want to adjust queue settings such as visibility timeout, message retention period, and access permissions, according to your requirements, but none of these are necessary for the purposes of this tutorial.
Create the Lambda function🔗
We will create a new Lambda function that performs the following steps:
- Receive and parse SQS messages. The function loops through each record in the queued batch of SQS messages, extracting project name, environment, pipeline, and any optional variables.
- Obtain an access token from Maia. We will provide the function with a client_id and client_secret, which we obtain when setting up API credentials in Maia. The function will use these to request an OAuth2 access token from the Maia authentication server. This token is used to authorize API requests.
- Trigger the pipeline in Maia. The function constructs a payload based on the SQS message, and sends a POST request to Maia's API to trigger the pipeline execution in the specified project and environment.
- Handle the response. Upon success, the function confirms the pipeline trigger. If an error occurs, it logs the details for further troubleshooting.
Download the function code to get started. The code will require some customization to work in your own environment, which we will cover later in the tutorial.
Create the function in AWS Lambda🔗
To create this function:
- Log in to the AWS Management Console.
-
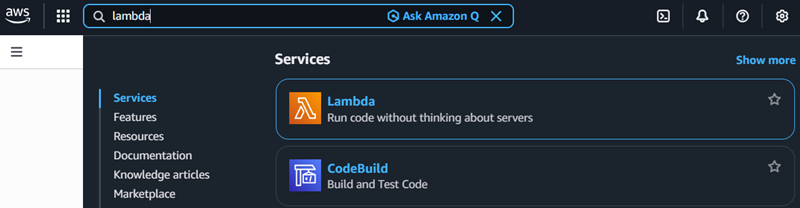
Navigate to the Lambda service. If you don't see the option on the Console home screen, use the search bar at the top to search for "Lambda".
-
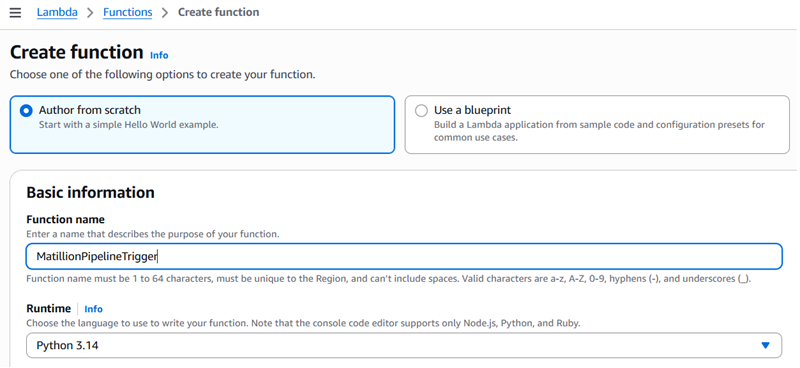
Click Create function. This will open the Create function page.
-
Select Author from scratch.
- Give your function a name. In this tutorial, we are using
MatillionPipelineTrigger. - Select Python 3.9 (or later) as the runtime.
- Leave the other settings as default, and click Create function. It may take a few moments for AWS to create the function.
Modify the function code🔗
If you have downloaded the function code from the link above, open the file in your preferred code editor. If you are writing the code directly in the AWS Lambda console, copy and paste the code into the code editor there. You will need to make some changes to the code to get it working in your own environment.
You will need to set some configuration variables in the code so the function will work in your own environment:
MATILLION_REGION: the region that contains your Matillion account. For example, if your account is set up in the US, you will also need set the value tous1.client_id: your Matillion client ID. For security, this isn't embedded within the script but is loaded from an environment variableMATILLION_CLIENT_ID. Ensure that the environment variable is set correctly.client_secret: your Matillion client secret. For security, this isn't embedded in the script but it loaded from an environment variableMATILLION_CLIENT_SECRET. Ensure that the environment variable is set correctly.PROJECT_ID: the Maia project ID that contains your target pipeline.PIPELINE_NAME: the name of the Maia pipeline to be triggered.ENVIRONMENT_NAME: the name of the Maia environment in which the pipeline will be executed.
You can also customize other optional fields in the payload as needed. For example, you may want to set specific values for agentId, executionTag, or versionName. You can also set scalar and grid variables directly in the code, if your use case requires it. The relevant section of the code looks like this:
        # --- Optional fields ---
        # "agentId": "your-agent-id",
        # "executionTag": "myExecutionTag",
        # "versionName": "myPublishedArtifactName",
        #"scalarVariables": {
        #    "var1": "val1",
        #    "var2": "val2"
        #},
        #"gridVariables": {
        #    "grid1": [
        #        ["col1", "col2", "col3"],
        #        ["col1a", "col2a", "col3a"]
        #    ]
        #}
Configure the Lambda function's trigger🔗
The final step is to configure a trigger for the Lambda function, so that it's invoked whenever a new message arrives in the SQS queue we created earlier. To do this:
- Open Lambda in the AWS Management Console.
- Select the
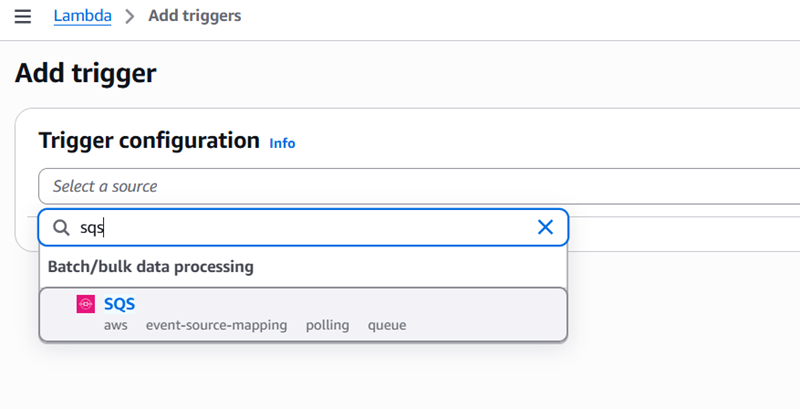
MatillionPipelineTriggerfunction you created earlier. - In the Function overview section, click + Add trigger.
-
In the Trigger configuration panel, select SQS from the drop-down.
-
In the SQS queue field, select the SQS queue you created earlier,
MatillionPipelineTrigger.fifo. - Leave the other settings as default, and click Add.
In a production scenario, you may want to adjust settings such as batch size and filter criteria according to your requirements, but none of these are necessary for the purposes of this tutorial.
Permissions🔗
AWS automatically:
- Grants Lambda permission to read from the queue.
- Creates an event source mapping.
Your Lambda execution role must include:
{
  "Effect": "Allow",
  "Action": [
    "sqs:ReceiveMessage",
    "sqs:DeleteMessage",
    "sqs:GetQueueAttributes"
  ],
  "Resource": "arn:aws:sqs:region:account-id:queue-name"
}
If you add the trigger in the console as described above, AWS handles this for you.
Testing the setup🔗
To test whether your queue and Lambda function are working correctly, you will need to send a test message to the SQS queue. Though there are many ways to send test messages to SQS (for example, using the AWS Management Console, AWS CLI, or any AWS SDK), for purposes of this tutorial we will trigger it from Maia itself. For this, we will create a simple Maia pipeline that uses an SQS Message component to send a message to the queue.
We will also create a pipeline in Maia that the Lambda function will trigger when it receives the message. This pipeline will perform a simple task that we can check to confirm that it was triggered successfully and our set up works—in this example, it will simply print the variable that we pass to it from the Lambda function. Of course, in a production scenario, you would replace this with your actual pipeline that performs the desired data processing tasks you need to trigger.
Important
Before running the test, remember that you must publish both pipelines in Maia after creating them. For details of this, read Publish a pipeline in the new user tutorial.
Prerequisites🔗
To create the test pipeline, ensure you have the following:
- Set up Cloud provider credentials with AWS access in your Maia environment.
- Ensure the credentials have permissions to send messages to SQS queues.
Create the test message pipeline🔗
- Create a new orchestration pipeline in Maia. Name it something like "SQS Trigger Test".
- Add an SQS Message component to the pipeline canvas.
-
Configure the SQS Message component with the following settings:
- Region:
us-east-1(you can change this if your queue is in a different region). - Queue name:
MatillionPipelineTrigger.fifo. -
Message: The JSON payload we're sending to the queue. In this tutorial, we're using:
{ "projectName": "Production Pipelines", "environmentName": "Production - Snowflake", "pipelineName": "Customer Data Load", "scalarVariables": { "name": "Test Customer" } } -
Message format: Plain.
- Message group ID:
pipeline-trigger-group(required for FIFO queues).
- Region:
Create the pipeline to be triggered🔗
- Create a new orchestration pipeline in Maia. Name it "Customer Data Load", matching the pipeline name in the SQS message.
- Add a Print Variables component to the pipeline canvas.
-
Configure the Print Variables component with the following settings:
- Variables to print:
name.
- Variables to print:
This pipeline will simply print the value of the name variable that we pass to it from the SQS message. If the test is successful, we should see "Test Customer" printed in the task history when the pipeline runs.
Run the test🔗
- Run the SQS Trigger Test pipeline to initiate the test by sending the test message to the SQS queue.
- Allow a few moments for the Lambda function to process the message and trigger the Customer Data Load pipeline.
-
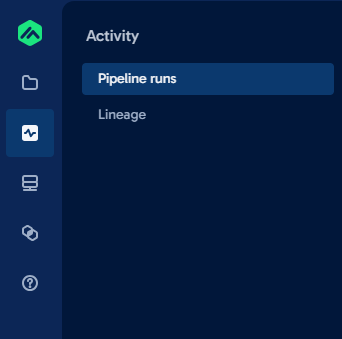
Check that the Customer Data Load pipeline appears on the Your activity page in Maia.
If everything is set up correctly, you should see that the Customer Data Load pipeline was triggered and that it printed "Test Customer" in the task history. Your SQS queue and Lambda function can now be used to trigger Maia pipelines based on messages sent to the SQS queue from any system you have configured to send messages in the specified format.